A Quartz Worktop Installation Example, Step by Step
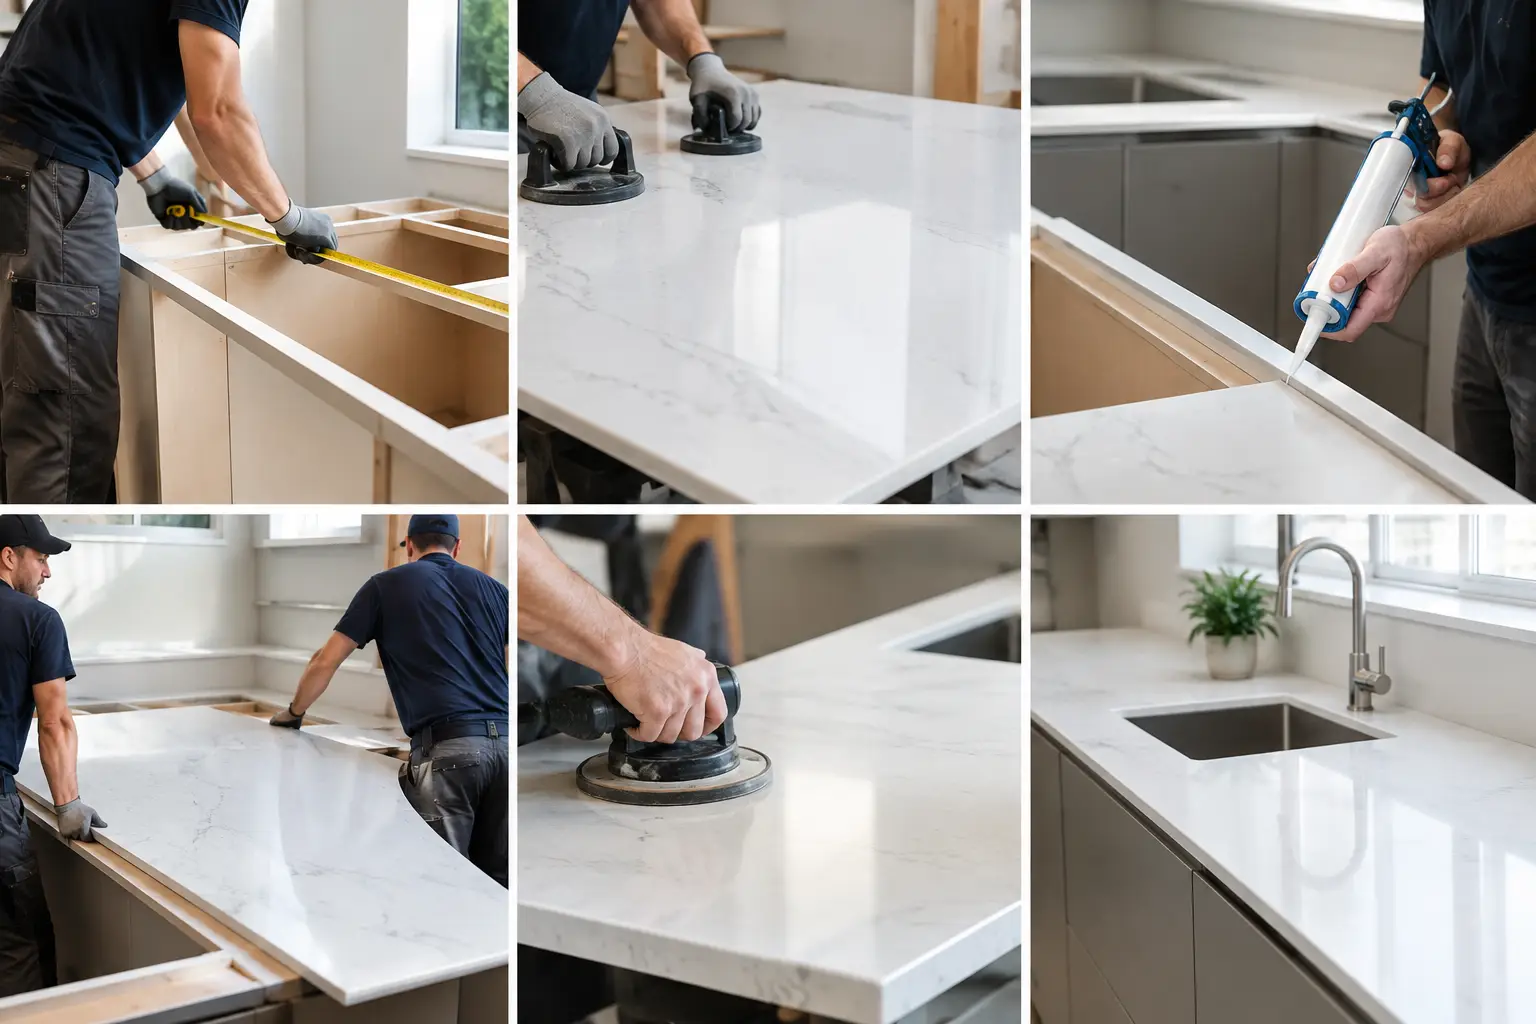
A quartz worktop installation example is useful because it shows where the real decisions sit. The colour and pattern matter, of course, but a good result also depends on sound cabinets, accurate measuring, well-planned joins and careful fitting around the sink, hob and walls. For many homeowners, a new worktop is the finishing piece that makes an existing kitchen feel properly refreshed.
If you like your current kitchen layout but the surfaces are scratched, dated or difficult to keep looking tidy, quartz can be a practical upgrade. It works particularly well alongside replacement kitchen doors, new handles, a sink and tap, allowing you to change the look of the room without the disruption of starting again from scratch.
A typical quartz worktop installation example
Imagine a kitchen in St Neots with a straightforward L-shaped run of base units, a separate island and a laminate worktop that has seen better days. The cabinet layout works well for the household, so there is no need to move plumbing, alter electrics or replace every cupboard. The aim is a lighter, more contemporary finish with warm-white replacement doors, brushed metal handles and a pale quartz worktop with a subtle vein.
The installation starts long before the stone arrives. Quartz is made to precise dimensions, so the existing units need to be in their final positions and properly prepared first. This is why it makes sense to plan doors, worktops, appliances and finishing details together rather than treating the worktop as an afterthought.
1. Checking the cabinets and the plan
Before choosing a slab, the base units should be checked for strength, level and secure fixing. Quartz is a heavy material. Most sound kitchen cabinets will support it when they are correctly installed, but weak, damaged or uneven units must be addressed first. A worktop cannot correct a cabinet run that slopes or moves.
In this example, the old laminate worktop is removed after the new door and drawer-front choices have been agreed. The fitter checks that the L-shaped cabinet run is level, that the island is firmly fixed to the floor and that there is suitable support around the planned hob cut-out. Small adjustments at this stage prevent larger problems later.
The homeowner also confirms practical details: the position of the undermounted sink, the tap style, hob model, drainer grooves and the preferred height of the upstand. These choices affect the template, so they should not be left until fitting day.
2. Choosing the quartz and edge detail
Quartz is an engineered stone surface, valued for its consistent appearance, hard-wearing finish and low day-to-day maintenance. It is available in a wide range of whites, greys, warm neutrals and darker tones, with designs ranging from fine speckling to marble-inspired veining.
A small sample is a helpful starting point, but it cannot show the full movement of a patterned slab. A pale veined quartz may look calm in one area and more dramatic in another. Seeing larger samples in a showroom makes it easier to compare the surface against door colours, flooring, handles and paint. Natural daylight in the kitchen should also be considered, particularly if the room faces north or has limited windows.
For this kitchen, the homeowner chooses a 20mm quartz with a softly veined, off-white background. A simple eased edge keeps the look clean and is easy to live with. A more decorative edge can suit some traditional kitchens, while a thicker-profile look can create greater visual impact, but both may add to the overall cost.
3. Templating once everything is ready
This is the point at which measurements become exact. A specialist templater visits after the cabinets are fitted, levelled and fixed, and after the sink, hob and any other relevant appliances are available or their final specifications are confirmed.
The templater records the length and depth of each run, wall angles, out-of-square corners, the location of cut-outs and any joins. In an older property, walls are rarely perfectly straight. A template allows the quartz to be made to fit the room rather than relying on assumptions taken from a kitchen plan.
In our quartz worktop installation example, the L-shaped worktop requires one carefully positioned joint. It is planned away from the sink cut-out where possible and where it will be less noticeable in normal use. The island can be produced as one larger piece, provided access into the property allows it. If access is tight, handling and fitting arrangements need to be discussed early, as quartz pieces are substantial and cannot simply be bent around a corner.
The team also confirms the upstand height and whether a full-height quartz splashback is wanted behind the hob. An upstand can give a neat finish where walls are not completely true, while a full-height splashback creates a more continuous look. The best option depends on budget, the style of the kitchen and the condition of the walls.
4. Fabrication away from the kitchen
Once the template is approved, the quartz is cut and finished before installation. Cut-outs for the sink and hob, drainer grooves, edge profiles and any required polishing are completed under controlled workshop conditions. This is one reason quartz worktops are not usually a same-day, off-the-shelf purchase.
Lead times can vary with the chosen material, supplier availability and the complexity of the job. It is sensible not to arrange final decorating or disconnect essential appliances until fitting dates are confirmed. A good plan allows for the old worktop to come out, the new surface to be installed and plumbing or electrical reconnections to be completed in the right order.
5. Fitting day and final checks
On installation day, the quartz sections are brought in carefully, set on the prepared cabinets and checked for fit. The pieces are secured with suitable adhesive, and the planned join is colour-matched and finished as neatly as possible. With patterned quartz, the installer will also consider how the veining meets at the joint, although an exact continuous pattern cannot always be guaranteed.
The sink and hob cut-outs are checked before final fixing. An undermounted sink is fitted beneath the quartz, giving a crisp edge that makes wiping crumbs and spills into the bowl easier. The tap is installed through the prepared hole, and the upstands or splashback are fitted where included.
At the end, the homeowner should inspect the worktop with the fitter. Look at the joins, edges, cut-outs and wall line in normal light. Minor gaps at uneven walls are generally finished with an appropriate sealant, but large gaps or unsupported sections should never be accepted as normal. The goal is a worktop that feels solid, sits neatly and works properly with the rest of the kitchen.
What this project changes without replacing the kitchen
The practical benefit is not just a more attractive surface. In this example, the homeowner retains a layout that already suits family life while improving the parts that are touched and seen every day. Replacement doors brighten the cabinetry, new handles update the detail, and quartz gives the preparation areas a more substantial, easy-care finish.
There are trade-offs to consider. Quartz costs more than laminate and needs professional measuring and installation. It is highly resistant to staining when cared for properly, but it is not indestructible. Use a chopping board, wipe spills promptly and avoid placing very hot pans directly on the surface. A mild cleaner and soft cloth are usually enough for everyday cleaning, while harsh abrasives are best avoided.
It is also worth being realistic about what a worktop alone can achieve. If doors are swollen, drawers are worn out or the overall colour scheme feels dated, combining the worktop with replacement doors and finishing touches often gives better value than fitting quartz onto a kitchen that still looks tired elsewhere.
See the options before making a decision
Photographs can suggest a colour, but they cannot show how a quartz surface feels beside a door finish or whether a handle works with your chosen tap. Visiting the Replacement Kitchen Doors To Size showroom near St Neots gives you the chance to compare samples, talk through your existing cabinet layout and understand what needs to happen before templating.
Bring a few photographs and rough measurements of your kitchen if you can. Whether your home is in Little Paxton, Huntingdon, Sandy, Biggleswade, Bedford or a nearby village, practical advice at the planning stage can help you refresh the kitchen you already have with fewer surprises along the way.